
전체 · SNS/카드뉴스 · 계절·명절
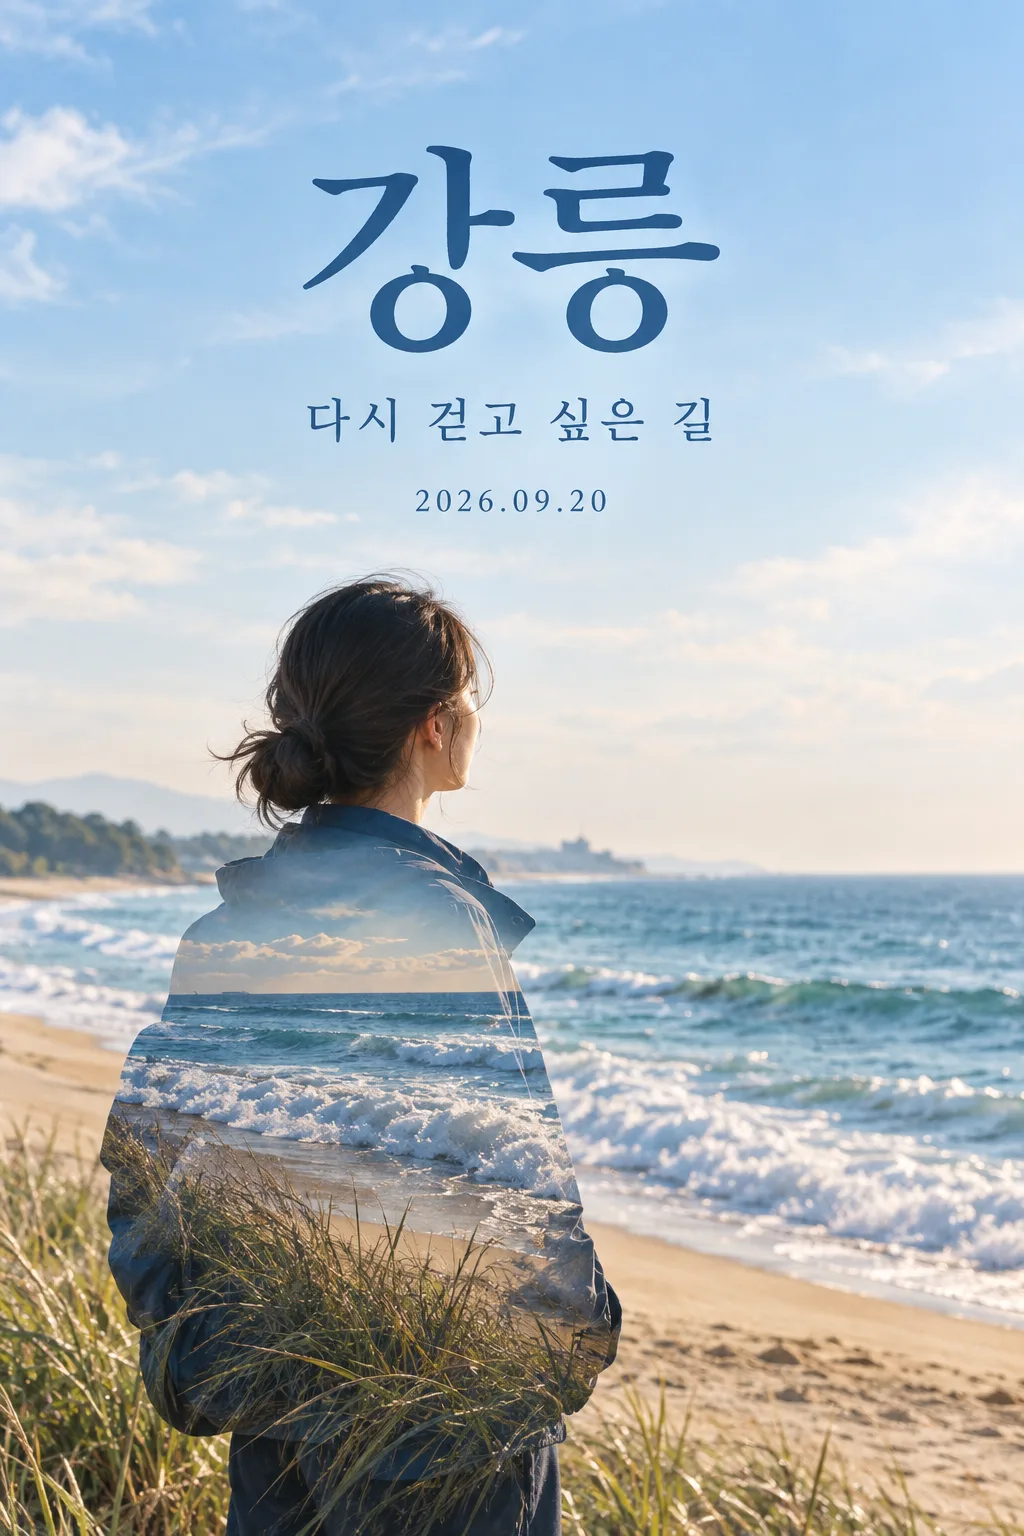
072내 여행 사진 이중노출 포스터
여행자가 자기 여행 사진과 장소 이름을 겹쳐 만든 기억 포스터 한 장을 인스타 피드나 스레드에 올려요.
칸 채우기
- 1칸을 채워요
- 2복사 버튼을 눌러요
- 3GPT 채팅창에 여행 사진을 올리고, 프롬프트를 같이 붙여넣어요
- 4여행 사진과 프롬프트가 둘 다 들어간 걸 보고 보내요
프롬프트 원문 보기 6,662자
Generate this image now. Draw it directly - do not describe it, explain it, or ask questions.
Output size 2480x3508 pixels, A4 portrait, 300dpi, print-ready poster.
Create exactly ONE finished 2:3 vertical Korean travel-memory poster. The user has attached ONE actual travel photograph in the same message as this prompt. Use it as the source of both the recognizable human subject, if present, and the visible real travel setting. Return one image, not a description, code, second image, panorama to crop, carousel, or a request for more images.

[Purpose]
A traveler wants to share one visual memory from their real trip on Instagram or Threads. The chosen place name is "【여행지】". The optional date is shown on its own line below if supplied. The personal-copy input is "【한 줄 문구】". The emotional art direction is "【사진의 기분】". Make an original double-exposure portrait poster: a clearly recognizable primary photograph or silhouette with a second layer made from the place, sea, street, mountain, sky, or texture that is actually visible in the attachment. It should feel specific to the user's photo, not like a random tourism advertisement. An image without a human subject can use the silhouette of a visible local object, building, window, wave or plant as the primary shape and still make one coherent poster.

[Scene]
Fill the whole portrait canvas with the finished flat poster. A single large subject or strong place-based silhouette occupies approximately 55-80% of the central height. Within it, blend an alternate crop or detail of the same photo to make a tasteful double exposure. Keep at least one region of the original photo visually clear so the viewer can tell this is the real trip. Use the actual horizon, architecture, coastline, weather, or vegetation in the photo as visual truth. Never introduce an invented landmark for "【여행지】" that is not visible in the attachment. If the photo is a close-up portrait with no visible geography, use its light, clothing texture or blurred real background for the second layer and express the location only through the user-supplied place name. The result must work as a complete travel post by itself: location, date if given, and one emotional line all inside the image. There are no multiple panels, no before/after half, and no photo collage grid.

[Attached photo]
The attached user photo is required. Preserve the identity, apparent age, face shape, hair, glasses and other distinctive features of every visible person. Do not invent a companion or replace a real person with a generic model. If the subject's face is not visible, do not fabricate one; build around the actual posture and scene. Preserve real objects and signs insofar as they are legible, but avoid turning indistinct signs into made-up business names. Do not claim a precise location, landmark or date beyond what the user typed and the photo visibly shows. Be respectful of the pictured people's likeness; no celebrity, fantasy character or impossible pose. If no photo is attached, do not fake a personal trip image; ask for one genuine photo instead of rendering a misleading poster.

[Text layout]
The location name "【여행지】" is the main typographic anchor, printed once in large legible Hangul in a calm upper-middle area around 18-28% of page height. Reserve the top 12% and bottom 15% of the canvas from essential lettering because website overlays may sit there. Put the user's one-line copy "【한 줄 문구】" in a secondary but phone-readable line immediately beneath the location, around 28-33%. If that input is "알아서 골라줘", do not print the instruction; write one fresh, restrained Korean line of no more than 18 Hangul characters prompted by only the visible photo and the chosen emotion. Do not assert that the traveler did, felt, saw, ate, or met anything not visible or provided. Optional date: "【여행 날짜】". If supplied, render exactly the entered date once as a small separate line below the copy, around 33-38%. If omitted, remove its entire line without substituting a current date. Do not put "사진의 기분" or the input emotion on the image as a form label. No slogan, tourism bureau logo, travel brand, fake booking details, or misleading map pin.

[Style]
Use fine-art travel photography and restrained editorial typography. Match the palette to the real image: sea and bright sky can support soft blue and warm sand; mountain mist can support grey-green and paper white; city evenings can support muted ink and amber streetlight. "【사진의 기분】" guides contrast, light and layout, not a fixed color preset. Let double exposure be visible but subtle: the human or object silhouette remains coherent, and the second photographic layer has a purposeful place inside it. This should look like an honest visual memory by a person, not an impossible scenic composite. Avoid fake neon, over-saturated sunsets, invented dramatic weather, cartoon destinations, travel agency stock style, or copying a particular existing poster.

[Visual hierarchy]
At site-card thumbnail scale, the viewer must see a strong subject or place silhouette and read the location name immediately. At normal phone scale the one-line copy and optional date must remain readable. Use one reliable high-contrast text area, do not place pale text over pale sky or tiny text on a busy face. Leave the eyes and mouth clear; the blended scenery may overlap clothing, hair, sky or the outer silhouette without obscuring the identity. The two exposures should read as one composed image, not two separate travel photos, and all information must fit within a single canvas.

[Lighting and texture]
Match the actual photo's perspective and light direction as much as possible. Keep authentic skin, fabric, water, stone, trees or street materials. Use natural transitions between exposure layers, with enough photographic detail to recognize the location visible in the source photo. No doubled head, phantom limbs, cloned person, pasted skyline, plastic skin, generic AI sea, unreadable signage or gritty filter over the words.

[Text rules]
Spell "【여행지】" exactly. Spell the entered copy exactly unless it is "알아서 골라줘", in which case invent only a short non-factual emotional line. If the date line is present, copy it exactly, without guessing a weekday or correcting a date from memory. Do not print placeholder braces, form labels, generated location facts, extra captions, or a second instance of the main place name. Keep all Hangul clean and naturally spaced.

[Avoid]
No multiple outputs, photos after the first message, code, crop plan, invented landmark, fabricated human face, added companion, false event or itinerary, fake weather, wrong date, unreadable location, tourism brand, watermark, mockup, or unlicensed copied image.
이 카드도 많이 사용해요



쓰는 법 · 자주 묻는 것
이런 때 쓰세요
여행에서 직접 찍은 사진 한 장을 기억 포스터로 만들어 올리고 싶을 때 쓰세요. 내 인물이나 풍경의 윤곽 안에 같은 사진의 바다·산·거리·빛을 한 번 더 겹쳐 보이게 하는 이중노출 형식입니다. 장소 이름과 짧은 한 줄이 한 장에 담기므로, 여행 일정표처럼 계획을 안내하는 이미지와 쓰는 자리가 다릅니다. 인스타그램 피드나 스레드에 여행 후기 첫 사진으로 올리기 좋습니다.
칸 채우는 법
- 여행지는 사진을 찍은 실제 장소 이름을 적으세요. 도시나 동네 이름만 적어도 됩니다. 유명 건물이 사진에 없으면 그 건물을 새로 그리게 하지 않습니다.
- 여행 날짜는 기억하고 싶을 때만 적는 선택 칸입니다. 실제로 다녀온 날짜를 적으세요. 비워 두면 날짜 줄 전체가 빠지고, GPT가 오늘 날짜를 대신 넣지 않습니다.
- 한 줄 문구는 결과 사진에 찍힙니다. 직접 쓴 짧은 말이 있다면 넣고, 없다면 「알아서 골라줘」를 선택하세요. 사진 속에 보이지 않는 만남이나 사건을 지어내지 않도록 했습니다.
- 사진의 기분은 색과 빛의 방향입니다. 여행지가 같아도 저녁 거리와 한낮 바다는 다른 모습이 되므로 사진 자체와 어울리는 기분을 고르세요.
사진을 넣는 순서
- GPT 채팅창에 실제 여행 사진 한 장을 올리세요. 아직 보내지 마세요. 사람과 장소가 함께 보이면 두 요소를 겹치기 쉽습니다. 풍경만 있어도 만들 수 있습니다.
- 같은 입력 칸에 이 카드에서 복사한 프롬프트를 붙여넣으세요.
- 사진과 프롬프트가 둘 다 들어간 것을 보고 한 번만 보내세요. 결과는 완성 포스터 한 장입니다.
사진만 먼저 보냈다면 프롬프트 끝에 「위 사진으로 그려줘」를 덧붙여 보내세요. 다른 사람이 뚜렷하게 나온 사진을 공개 게시물에 쓰려면 당사자에게 허락을 받으세요. 사진 속 장소와 적은 여행지가 다르면 헷갈리는 포스터가 되므로 먼저 칸을 고치는 편이 좋습니다.
그림이 나오면 꼭 볼 것
사람 얼굴이 원본과 같은지, 실제 사진에 없던 랜드마크나 동행인이 생기지 않았는지 먼저 보세요. 장소 이름은 사이트 목록에서도 읽힐 만큼 커야 합니다. 선택한 날짜가 있다면 숫자와 점을 하나씩 대조하고, 날짜를 비웠다면 그림에도 날짜가 없어야 합니다. 이중노출이 과해 얼굴이 두 개로 보이거나 장소가 흐려지면 여행 기억보다 효과가 앞선 것입니다. 결과는 한 장 그대로 저장해 게시할 수 있습니다.
자주 묻는 것
- 풍경만 찍은 사진도 되나요? 네. 사람이 없다면 실제 사진 속 건물·파도·나무 같은 형태를 겹쳐 한 장으로 만듭니다.
- 랜드마크를 자동으로 추가하나요? 아니요. 사진에 없는 유명 건물을 지어 넣으면 실제 여행 사진처럼 보이지 않으므로 넣지 않습니다.
- 날짜를 꼭 넣어야 하나요? 아니요. 비워 두면 날짜가 통째로 빠집니다.
- 여러 사진을 합쳐야 하나요? 아니요. 여행 사진 한 장과 프롬프트를 함께 보내 완성 이미지 한 장을 받는 카드입니다.